Thursday, December 16, 2010

Freezing Fresh Lemon Juice

I love the scent of fresh lemons.  When shopping in the produce section of my local Costco, I spotted packages of meyer lemons and couldn't pass them up.  I brought some home with me and decided to freeze the juicy goodness into ice cubes.  It's very simple and adds the perfect touch to any lemon dessert.  I wanted to also try and freeze the peel, so I zested it and froze what I could into two ice cubes.  I haven't used any yet in a recipe, so I can't tell you if it tastes just as good as fresh or not.  


A good zester is a must.  Mine is a Microplane.


I stuffed the zest into two ice cube molds and filled the rest with the juice.


I made a total of 32 lemon cubes.  I only used about 6-8 lemons.  Once the cubes are frozen I take them out of the molds and store them in a freezer zip lock bag.  When using in a recipe make sure you allow enough time for the cube to melt; otherwise, try the microwave.

Monday, December 13, 2010

My New Blender and Homemade Peanut Butter

I've been researching the best of the best blenders for quite a few years now.  I narrowed it down to two: the Vitamix and the Blendtec.  I reviewed Consumer Reports, youtube videos, websites and even the actual blenders themselves.  I'm lucky enough to have two people in my family with  both.  I decided on the Blendtec for a few reasons.  There are two sizes that the Blendtec jars come in.  The standard is the 64 ounce and then they have come out with a new 96 ounce jar that has a four inch blade.  The actual blender itself comes with a 64 ounce jar.  I purchased the larger jar in addition to the 64 ounce one.  I have my reasons for wanting two jars.  The rest of my reasons for purchasing the Blendtec over the Vitamix are as follows:

Quiter
Computerized
Fits under a standard cabinet
Lighter base
More shallow jars (easier for scraping things out)
No plunger needed

There are more reasons, but those are the major one's.  My family, like most, love green smoothies.  This machine makes them so easy to make.  No shaking of the blender, or plunging ingredients down.  In 20 seconds or less we have a wonderful, nutritious, green smooth packed with wholesome goodness.  I purchased mine through Costco and got an additional 4 year warranty making the total warranty 7 years.  That is identical to Vitamix.  I like the Vitamix also, I just decided to go with the Blendtec because I liked it a little bit better.  

Today, I made homemade peanut butter in less than a minute.  I put in three cups of dry roasted unsalted peanuts.  Set the level to 1 and let it grind for about 15 seconds.  Then I turned the speed to level 5 and let the machine do the rest of the work for an additional 30 seconds or so.  I made smooth today, but chunky would be just as easy.  I added about 3/4 teaspoon of salt.  I had a few empty peanut butter jars so I filled them right up.  I made a total of three batches (3 cups of peanuts in each) and filled two Costco size peanut butter jars (the organic kind).  I love the flavor and so does my family.  I bought the bag of peanuts in the bulk section at my local Winco.  I paid $4.81 for the bag.  


I have a list a mile long of all the different foods I want to try out.  I'll keep you posted on how that goes.  For now, I will easily use my blender 2-3 times a day.  It even whips fresh whipping cream in a matter of seconds.    If you are in the market, I highly recommend Blendtec.  It's definitely an investment, but one worth making.

{I was not paid by Blendtec to write this post.}

Monday, November 22, 2010

Pumpkin Crumb Cake


Pumpkin Crumb Cake

Yield: (2) 9" round cakes or (1) 9x13" pan

Cake
1/2 cup butter, softened
1/2 cup sugar
2 large eggs
1 teaspoon vanilla
1 1/4 cups flour
1/2 teaspoon salt
1 1/2 teaspoons baking powder

Pumpkin Filling
1 (14 oz.) can pumpkin puree (1 1/2 cups)
3 eggs
2/3 cups whole milk
1 cup brown sugar
1 1/2 teaspoons cinnamon
1/2 teaspoon nutmeg
1/2 teaspoon ginger

Crumb Topping
1/2 cup butter, softened
1 1/2 cups flour
1/2 cup brown sugar
1 1/2 teaspoons baking powder
1 teaspoon cinnamon
1/2 teaspoon nutmeg
1/2 teaspoon ginger

Preheat the oven to 350 degrees.  Grease and prepare baking pan(s).

Make cake batter:  In a large mixing bowl, with an electric mixer cream together the butter and sugar until light and fluffy.  Add the eggs, one at a time, beating well after each addition.  Mix in vanilla.  In a separate mixing bowl, mix (or sift) flour, salt and baking powder together.  Add dry ingredients to butter and egg mixture.  Mix just until combined.  Set aside.

Make Filling:  In a separate large mixing bowl, add the pumpkin puree, eggs, milk, brown sugar and spices.  Set aside.  
Make Crumb Topping:  In a separate mixing bowl, combine the butter, flour, brown sugar, baking powder and spices.  Mix until topping is loose and crumbly.

Fill the bottom of your pan(s) with the prepared cake batter.  Next, pour the pumpkin filling over the top of the cake batter, and sprinkle the crumb topping on top of the filling.  Bake for 45 minutes or until the filling is set and topping is golden brown.  Cool before slicing . Serve with whipped cream or ice cream.

{cooks note}

This cake is extremely good.  I served mine with fresh whipped cream.  I took my pictures when there was no natural light to be seen (the darn winter months will be tough for me to take decent pictures since it get's dark so fast in the evening).  I'm not a pumpkin pie fan, so this type of dessert is my thing.  I'm totally diggin' it and it's on my top 5 favorite fall desserts.  It takes quite a few mixing bowls, but definitely worth the effort.

Back In The Saddle Again

Wow, have I really taken this much time off?  Well, to make it up to you, I will post my new favorite pumpkin recipe.  It will definitely knock your socks off.  Stay tuned...
I am finding it harder and harder to post since the computer I work on is now in my babies room.  She is supposed to take two naps a day, but in the past few days has refused due to her molars coming in and I believe an ear infection.  So, when she is napping, I can't work on my posts and when she is up I can't work on my posts.  My children take priority and they don't let me sit and spend the time I need to on this little blog.  I'm trying to work something out.  In them meantime enjoy the upcoming recipes.  Oh, and I'm sorry to inform you that I will not be much help for your Thanksgiving Day feast.  With our move and everything else going on, I just haven't gotten it done.  Maybe next year...

Friday, October 15, 2010

Moving

I have been missing a lot lately.  It might have to do with the fact that I'm preparing my little family of 5 to move across the country next week.  I'm extremely busy and feeling very overwhelmed with it all.  I promise to be back...I'm just not sure when that will be.  We don't even have a place to live yet!  Pretty typical for us.  Although, each time we add another child, so it makes it a little more difficult.  I'm sure things will be okay.  If you have any suggestions for activities for our four day car ride, I would really appreciate it.  My husband and I are both driving a car, so there will not be an extra set of hands to help.  Our children are ages 5,3, and 1.  Please help!

Tuesday, October 5, 2010

Herb Foccacia


Herb Foccacia
from Keeping Up


2 3/4 cups flour
1 teaspoon sugar
1 teaspoon salt
2 1/2 teaspoons dry yeast
1 large clove garlic, minced
3/4 teaspoon dried rosemary
1 1/2 teaspoons Italian seasoning (or 1/2 teaspoon each oregano, thyme and basil)
1 tablespoon olive oil
1 cup warm water

In the bowl of a mixer, combine all ingredients with the dough hook attachment.  Mix at medium speed for 5 to 8 minutes or until dough is smooth and has pulled away from sides of the bowl.  Remove dough hook, cover bowl with plastic wrap and allow dough to rise for 30 minutes.

Deflate dough and allow to rest for 5 minutes.  Spread dough out by hand on an oiled baking sheet into roughly ad 8"x10" rectangle.  Use your knuckle to make indentations on dough every 1/2-inch, or make holes over entire surface with a fork.  Lightly brush dough's surface with olive oil and bake in a 425 degree oven for 15 to 20 minutes, or until golden brown.

1 tablespoon olive oil
1/2 teaspoon kosher salt

Stir together olive oil and salt and brush over the surface of hot bread.  Serve immediately.

{cooks note}

This bread is so good, especially with the herbs.  I didn't end up using the whole amount of flour the recipe called for.  Each climate and elevation with bring different results.  From start to finish it was 1 hour total.  It goes perfectly with this soup.

Saturday, October 2, 2010

Winner

I'm sorry this is so late. Life has gotten kind of crazy for my family. Better late than never, right?

The winner of the Cox's Honey giveaway is:

Jenna...

Ditto on everyone's comments....warm wheat bread....cornbread...homemade rolls...PB sandwiches...etc, etc. The possibilities are endless!

Congratulations Jenna. I know you will put the honey to good use. Please send me your information via my email and the honey will be shipped right to your front door.

Thanks for entering everyone and a big thank you to Cox's Honey for sponsoring another giveaway.

Friday, September 24, 2010

Cox's Honey Giveaway: Round Two


Because I have been so lame with this blog lately (is anyone still looking?) and because it's Friday, a giveaway is in order.  Cox's honey would like to give one lucky winner a case of twelve 20 oz. containers of their creamed honey.  

Here's how to enter:

What is your favorite fall treat to eat with honey?

You have until 11:59 pm on Friday to enter.


{image via cox's honey}

Wednesday, September 22, 2010

Honey-Lime Chicken Enchiladas


Honey-Lime Chicken Enchiladas
from Keeping Up

1/2 cup honey
1/4 cup lime juice
1 tablespoon chili powder
1/2 teaspoon garlic powder
1 1/2 pounds chicken, cooked and shredded

Stir together honey, lime juice, chili powder and garlic powder until combined.  Add chicken and let sit in marinade for at least 30 minutes.

2 (10-ounce) cans green enchilada sauce
1 cup half and half
flour tortillas
shredded colby jack cheese

Mix enchilada sauce with half and half.  Spread roughly 3/4 cup of the sauce in the bottom of a 9"x13" baking dish.  Fill flour tortillas with marinated chicken and shredded cheese, roll-up, then place side-by-side in baking dish.  Pour remaining enchilada suace over the top of the enchiladas and top with more cheese.  Bake at 350 for 25 to 30 minutes.

{cooks note}

An easy dish to prepare ahead of time and quick to make.  Serve with Spanish rice and refried beans to make the meal complete.

Wednesday, September 15, 2010

Creamy Lemon Chicken


Creamy Lemon Chicken
from Keeping Up

2 tablespoons olive oil
10 boneless, skinless chicken tenders
1 teaspoon Herbes de Provence
1/2 teaspoon creole seasoning or other spicy seasoning salt
1 cup reduced-sodium chicken broth
1 3/4 cups heavy cream
zest of 1 lemon
2 teaspoons lemon juice

3/4 pound fettuccine, cooked al dente according to package directions

Pat chicken tenders dry and sprinkle with Herbes de Provence and creole seasoning.  Heat oil in a skillet over medium-high heat and brown tenders on both sides.  Add chicken broth and simmer just until chicken is cooked through, 1 to 2 minutes.  Remove chicken from broth and set aside.

Allow broth to simmer and reduce down for a few more minutes, then add cream and lemon zest.  Simmer for 10 to 12 minutes or until sauce has reduced to desired consistency.  Stir in lemon juice and add chicken back to sauce.  Serve over fettuccine.

Herbes de Provence is a French herb blend, readily available on the spice isle.  Your guests will never know these sophisticated flavors came together in 20 minutes!

{cooks note}

This dish will knock your socks off!  I added a little cayenne pepper to mine instead of creole seasoning.  I didn't want it too spicy because then my kids wouldn't eat it.  If you do not have chicken tenders like me, then cut your chicken down the middle and then you will have a chicken tender.  Once the chicken was browned on both sides and it was ready to be taken out of the pan, I placed it on a plate and covered it tightly with foil and stuck it in a warmed oven so it would stay warm and moist.  I also grated some fresh Parmesan cheese over the top of the chicken once it was added to the pasta.  Please go and try this soon.  It is worth a special trip to the grocery store just for the Herbes de Provence.  Oh, and your house will smell divine.


Browning chicken.


The sauce and chicken ready to join the pasta.


Please don't overcook your pasta...there is nothing worse than mushy overcooked pasta.  Set the timer!


Voila!

Tuesday, September 14, 2010

Granola


Granola
from my mom

10 cups Rolled Oats
1 cup Wheat Germ
2 cups Sunflower Seeds
3 cups Nuts (Almonds are my choice)

1 1/2 cups Brown Sugar (packed)
1 1/2 cups Water
1 1/2 cups Vegetable Oil
1 1/2 cups Honey (I always use Cox's creamed honey)
1/2 cup Molasses
1 1/2 teaspoons Salt
2 teaspoons Cinnamon
3 teaspoons Vanilla

Add the first 4 ingredients into a bowl and stir.  Then combine the rest of the ingredients into a pan and cook on the stove until the sugar has dissolved--do not boil.  Pour syrup over dry ingredients while stirring.  Bake at 300 degrees for 20-30 minutes stirring every 10 minutes.  When done, cool pan and continue to stir.  Store in an air tight container in a cool place.

{cooks note}

I've been sick lately; therefore, my lack of posts.  I never thought at 29 I would get a double ear infection.  To top it off, I also got a sinus infection.  I am craving fall like no other.  It's still too hot here to wear pants.  Ugh!  In the spirit of fall, I decided to make my mom's delicious homemade granola.  The smell of my house yesterday was heavenly and made me happy.  My family loves this granola and we eat it every day until it is gone.  It's simple and tasty--just how I like it.  You can add whatever else you would like...cranberries, raisins...there are no rules.  I add a few scoops of ground flax to my dry mixture.  It probably equals out to be 1/4 cup.  Once you have everything mixed together, pour the mixture onto 3 baking sheets.  I have done two in the past and it takes much longer to cook.  I also have played with the oven temperature and increased it to 325 degrees.  Since my oven can only hold one pan at a time, I cook them individually.  It will seem like your timer is ringing every 10 seconds, but be patient, it will be worth it in the end.  I would say that I cooked each pan for 30 minutes total...sometimes I have to add in an extra 10 minutes depending on how crunchy I want the granola to turn out.  When finished, make sure you let the granola cool on the pan stirring occasionally.  If you think it needs to bake longer, don't be afraid to put it back in the oven.  Add this to your favorite yogurt or eat it with milk, either way you will love it.

*I buy slivered almonds at Costco.  You can also find them in the bulk isle at Winco.

Tuesday, September 7, 2010

Creamy Bacon Carbonara


CREAMY BACON CARBONARA
from just get off your butt and bake

2 eggs
1/4 cup Cream
1/3 cup Parmesan
Fresh diced Parsley or dried flakes
1/4 tsp. Salt
1/2 tsp Red Pepper flakes
*(I doubled the Sauce recipe, and it was perfect)
1/2 lb. bacon
1 small onion, chopped (opt)
3 mushrooms sliced (opt)
1/2 lb. Pasta

DIRECTIONS:

Beat the eggs, cream, Parmesan, parsley, salt and the red pepper together in a bowl. I just used a fork. Fry the bacon until crisp, then crumble and set aside. With 1 -2 Tbsp. bacon grease, saute the onion and the mushrooms until the onions are translucent and golden. Drain the pasta and while still warm, add to the onions and mushrooms. Pour cream mixture into the pasta, and stir over low heat for one to two minutes. (**I doubled the sauce recipe and I saved a bit of the pasta water, just in case my sauce got thicker than I liked – simply add a bit if you need it) Don’t do this on high heat, or you will make scrambled eggs. Serve with additional Parmesan, and a loaf of Crusty French bread and a salad. So Good!

{cooks note}

My whole family loved this new recipe.  I've made something similar to it, but the sauce did not call for egg in it.  Definitely double the sauce recipe.  Please excuse the lack of color in the photo.  I'm addicted to mangos and eat them with at least one meal a day.  All of the food on my plate sort of just blended in together, which is "breaking" the color rule for me.

Tuesday, August 31, 2010

Grace's Banana Bread


Grace's Banana Bread
from Favorites


5 large ripe bananas
4 eggs
1 cup shortening
2 cups sugar
4 cups flour
2 teaspoons baking soda
1 teaspoon salt

In mixing bowl, beat eggs; add bananas until smooth.  Add shortening and sugar and mix well.  Add flour, soda, and salt and combine.  Pour into 3 greased (8"x4") loaf pans and bake at 300 degrees for 60 to 65 minutes, or into 2 greased large (9"x5") loaf pans for 75 minutes, or until toothpick comes out clean.  Cool in pans for 5 minutes, then transfer to cooling rack.

{cooks note}

I love this banana bread recipe.  I like to use my mini loaf pans to bake them in. They make great little treats for neighbors and friends.  My kids love this stuff...especially when I make a simple powdered sugar frosting to drizzle over each piece.  Highly addictive I tell you.  I prefer my banana bread with walnuts, but my kids do not.  I make two with nuts and two without.  Stay tuned over the next few months for a more health conscious recipe that is just as good.

Monday, August 30, 2010

Fresh Raspberry Sour-Cream Crumb Cake


Fresh Raspberry Sour-Cream Crumb Cake
from Williams-Sonoma

Ingredients:
For the crumb topping:
1 cup all-purpose flour
2/3 cup granulated sugar
Grated zest of 1 lemon
8 Tbs. (1 stick) unsalted butter, melted 

For the cake:
1 3/4 cups all-purpose flour
1 cup granulated sugar
2 tsp. baking powder
1/4 tsp. baking soda
1/4 tsp. salt
3 eggs
1 cup sour cream
1 tsp. vanilla extract
2 cups fresh raspberries
2 Tbs. confectioners’ sugar 

Directions:
Preheat an oven to 350°F. Grease and flour a 10-inch round springform pan.

To make the crumb topping, in a small bowl, stir together the flour, granulated sugar and lemon zest. Add the melted butter and stir with a fork until the mixture is crumbly. Set aside.

To make the cake, in a bowl, stir together the flour, granulated sugar, baking powder, baking soda and salt.

In another bowl, whisk together the eggs, sour cream and vanilla until well blended. Make a well in the center of the flour mixture and add the sour cream mixture. Beat until smooth and fluffy, about 2 minutes.

Spoon the batter into the prepared pan and spread evenly. Cover evenly with the raspberries. Sprinkle the crumb topping evenly over the berries.

Bake until the topping is golden brown and a toothpick inserted into the center of the cake comes out clean, 38 to 42 minutes. Transfer the pan to a wire rack and let cool for 20 minutes. Remove the sides of the springform pan. Dust the cake with the confectioners' sugar and serve warm or at room temperature, cut into wedges. Makes one 10-inch cake.

{cooks note}

I made this a few months ago when I got fresh raspberries at Costco.  I had forgotten about it, and was reminded of it this weekend.  You still have time to make it while the berries are still in season.


Flour a springform pan.  I sometimes add a piece of parchment paper to the bottom.


The batter just before the fresh berries and crumble are added.


Aren't those the most beautiful raspberries ever?  I wish I could say I picked them from my garden, but I can't.


The crumble topping.  I loved how this got nice and crunchy on top.  It gives an added texture to the moist cake.


Dust with powdered sugar.


Whip up some fresh whipped cream (with vanilla bean paste of course) and enjoy.

Friday, August 27, 2010

Lemon Pepper Tilapia


Lemon Pepper Tilapia

Tilapia fillets
Lemon pepper seasoning
Olive oil

Preheat oven to 400 degrees.  Place foil or parchment paper down on a baking sheet.  Rub a little olive oil over each fillet and sprinkle with lemon pepper (top and bottom).  Bake for 15 minutes.

{cooks note}

Okay, this really isn't a recipe.  More like an idea for an easy summer meal.  I thinly sliced red potatoes and yellow onion and added olive oil, seasoning salt and pepper and tossed in a bowl and then laid them out on a foil lined baking sheet.  Bake in a 450 degree oven for 30-40 minutes.  We like the tops crispy, so I turn the broiler on last minute and let them get nice and golden for about 5 minutes or so.  

Tuesday, August 24, 2010

French Pastry Puffs


French Pastry Puffs
from my friend Kiersta

4 1/2 cups flour
4 1/2 tsp baking powder
3/4 tsp nutmeg
1 1/2 tsp salt

Mix all dry ingredients together and set aside.

1 1/2 cups sugar
1 cup shortening
3 eggs

In your mixer cream shortening and add sugar and blend well and then add eggs (it is best if you use room temperature eggs, but it will work if you don't) one at a time until blended.

Then alternate adding dry ingredients to creamed mixture with 1 1/2 cups milk (whole is best). Keep alternating between the wet and the dry...ending with milk until all is blended. Grease mini muffin tins well with shortening. Spoon batter into tins. Bake at 350 for 10-15 minutes. These will not get really dark brown on top so use a toothpick to check if done.

Melt in a bowl 1 cup of salted butter. In another bowl mix together 1 1/2 cups sugar and 3 tsp cinnamon. After muffins are out and cooled for a few minutes out of the pans, dip tops in butter and then roll in sugar and cinnamon mixture. This recipe makes 8 doz mini muffins 

{cooks note}

I love summer a lot, but with these high temperatures and not wanting to go outside and melt after 10 seconds, I am SO ready for fall. Too bad we really don't have a fall here.  Either way, I was craving something that reminded me of fall and these are one of the things that came to mind.  They are essentially mini donuts in my eyes.  I like using a mini muffin tin because then you can pop one whole one into your mouth...if you are into that sort of thing. 


Wednesday, August 18, 2010

Back To School Lunch Ideas

This will be my first year sending a child off to school all day long.  That means I will be sending him off to school each day with a homemade lunch in tow.  I have been trying to come up with some easy ideas to try and mix it up a bit for him--he would eat peanut butter and honey every day if I let him.  I've also been questioning my seasoned friends who have been doing the school lunch thing for years.  In his lunch I will include a main dish item, a fruit, a vegetable, something crunchy (chips, crackers, etc.) and a little treat.

I got my son a really great lunch bag at Costco (of course) that came with an ice pack and a stainless steel water bottle.  All for $9!  I also bought one of these.  He loves tomato soup, so it will work perfectly for that.  Some other ideas for the thermos would be:  

Any kind of soup
Hot Chocolate (special treat)
Milk (we always liked it when my mom would send us a thermos of cold milk and then homemade granola so we could have granola cereal--it was the best)

Since I don't want to send him to school every day with a sandwich I got to thinking of some other ideas that would suit his taste.  My friend told me she sends tortilla wraps with her kids.  I went to the store the next day and bought all the necessary ingredients to do a test run.  It was a success!  Here are a list of possible ingredients:

deli meat ( we like the fresh deli meat from costco--ham, roast beef and the herb roasted turkey)
shredded lettuce
spinach
any kind of cream cheese spread that would go well with deli meat (we like the whipped cream cheese and chives)
chopped bacon pieces

peanut butter and jam or honey

The wrap pictured below is one I made for myself, so it has tomatoes in it.  My son does not dig tomatoes in his, but I do.  I use the durum wheat uncooked tortillas from Costco.  I would cook up a bunch and store them in an airtight bag for use throughout the week.  That way you are not cooking one every morning.  Once the wrap is made, roll it up tightly in saran wrap.

Some other main dish items I will send are:

Ham and cheese roll-ups
and
Peanut butter and jam/honey sandwich (of course)

My son won't like me to mix it up to much on him, so I will stick with 4-5 different items to rotate from.

My friend also showed me these awesome containers found at The Container Store.  They are great for dipping vegetables in ranch dressing or any other use you can think of.  Seriously, what child doesn't like dipping carrots in ranch?  

For the fruit part of his lunch I will stick with his favorites.  Cut up apples slices, unsweetened apple sauce, watermelon, cantalope, grapes, strawberries and mandarin oranges (the fresh ones).  I'll have to work with what is in season, but mostly he loves any kind of fruit.

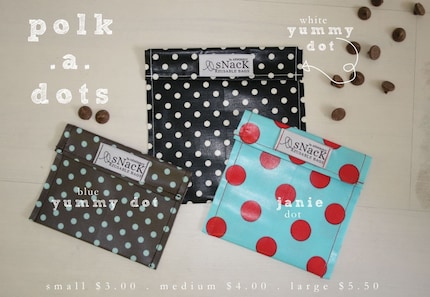
Now for the crunchy items.  I found these reusable snack bags about 6 months ago and love the idea.  I don't own any yet, but plan on purchasing some soon.  I think they are a great way to eliminate overusing plastic bags.  They are easy to clean and easy for kids to use.  They also come in three sizes--small, medium and large--and many different patterns.  Check out Armommy's site for more awesome products.  

medium snack reusable bags . polk.a.dot patterns

Now for my son's favorite part...the treat.  I plan on freezing cookies and bars whenever I make them.  They are really convenient and most anything will freeze well if stored properly in the freezer.  For the times when I don't have something homemade, I will have a little candy stash to pull from.  It will take great self-control on my part to not sneak any away, but I think I can do it.

Oh, and the drink.  I like my kids to drink as much water as possible, but since I'm so awesome, I'll probably send him off with juice 3 times a week.  I like the 100% fruit juice drinks found at Costco.  I can't remember if they are the Kirkland Signature brand or Hanson's.  

That should wrap it up for me.  I'm sure I'll learn as I go of what works and what doesn't, but for now, this is what I have.  I'd love to hear from you mom's out there who have done this before (even if you aren't a mom yet, I'd love to hear any of your ideas).  What do you send in your children's lunches?  

Friday, August 13, 2010

Pineapple Mango Salsa


Pineapple Mango Salsa
from the Pioneer Woman

1 whole Pineapple, Peeled And Diced
1 whole Mango, Diced
½ whole Medium Red Onion, Finely Diced
1 whole Jalapeno, Seeded And Diced
Fresh Cilantro, Chopped
1 whole Lime, Juiced
Dash Kosher Salt
Dash Granulated Sugar (optional)

Preparation Instructions
Combine diced pineapple, mango, red onion, jalapeno, and cilantro. Squeeze in lime juice and add salt and sugar if needed. Stir to combine. Serve within an hour with tortilla chips or on top of chicken or fish.

{cookes note}

I love mango.  We eat at least one a day at my house.  Pineapple mango salsa is a great alternative to pico de gallo if you want to mix things up on your menu.  I like to serve mine with fish.

Monday, August 9, 2010

Gloveables


Who said you couldn't look good when doing the dishes?
I've never looked better.  :)

Tuesday, August 3, 2010

Cooking Bacon: The Easy Way


This is the best way I have found to cook bacon with NO mess.  Let's go through the steps together.


You will need one baking sheet, bacon, heavy duty foil and an oven.


Line your baking sheet with the heavy duty foil. 


Place the bacon on the lined baking sheet.  Put the pan in the oven and turn the oven on to 400 degrees.  Cook for about 20 minutes.  Cooking times will vary depending on the oven.


You have a nice pile of greasy bacon when you are done.


Let the bacon cool on a plate lined with paper towels.  


Now do the dishes.  Fold up your foil and throw it away.  I told you there was no mess.  I like to cook my bacon all in one day so I can freeze it for later uses.


**My sister just called and told me she cooks her bacon on a rack and then places the rack on the baking sheet to catch all of the drippings.  Then you get even more fat off of the bacon.  I guess that wouldn't go with my "no mess" policy on this one.  :)

Thursday, July 29, 2010

Baked Green Beans with Bacon and Cheese


{cooks note}


When I had Blake, my friend brought this as part of her dinner to me.  My family was immediately in love.  She told me how she did it, so there is really no "real" recipe.  I'll do my best to explain.  Either way, it's pretty easy to put together and everyone loves it.  Definitely not on weight watchers plan.


Baked Green Beans with Bacon and Cheese
from my friend Brooke


1 package frozen green beans
Shredded Cheddar cheese (I use a Mexican blend from Costco)
Cooked bacon, chopped (about 6 slices)
Olive Oil
fresh ground peper
Kosher or Sea Salt

Preheat oven to 425 degrees.  Place frozen beans in a microwave safe bowl and add about half an inch of water.  Cover tightly with saran wrap and place in the microwave for 3-4 minutes, or until beans are not frozen anymore, but definitely not cooked.  Drain the water from the bowl and place the beans on a quarter baking sheet (half the size of a normal cookie sheet).  You can use a cookie sheet, but you will have more room on it.  I would use it if you double the recipe.  Drizzle about 1-2 teaspoons of olive oil over the beans and mix them so all the beans are lightly coated with oil.  Sprinkle salt and pepper over the top and bake in the oven for about 5-8 minutes.  Test one bean to make sure it's getting close to done.  Change oven temperature to a high broil  Add chopped bacon and put back in the oven for another 1-2 minutes. Take out and add the cheese.  Bake for another 1-2 minutes or until the cheese has melted.

Times may vary for each oven.


Sometimes, very rarely, I buy this full cooked bacon from Costco.  It's a complete time saver in situations where I have no time.  Other times, I cook 3 pounds of bacon in batches in my oven and freeze it.  A how-to on that is coming up soon.


The six ingredients.


I like to buy my frozen vegetables at Costco.  They are much cheaper and I like the quality far better than most grocery stores offer.


Bacon is key to this dish.


This totally takes the healthiness out of eating your vegetables, but every once in a while it's okay.