I had plans to start posting recipes again, but this week things have changed for our family. Go here to read more about it.
Thursday, May 26, 2011
Wednesday, March 30, 2011
Crispy Oven-fried Chicken

Crispy Oven-fried Chicken
from Keeping Up
1 cup Rice Krispies cereal
1/4 cup grated fresh parmesan cheese
2 teaspoons paprika
1/2 teaspoon cumin
1/2 teaspoon salt
1/8 teaspoon pepper
3 cloves garlic, minced
1 large egg, beaten
4 boneless, skinless chicken breasts
Place all ingredients (except egg and chicken) in a food processor and pulse until uniformly mixed. Pour mixture into a shallow dish. Dip each piece of chicken in egg, then in seasoning mixture, pressing to coat. Bake on a greased baking sheet in a 350 degree oven until no longer pink in the center, about 30 minutes. Let stand 5 minutes before serving. Serve with yogurt dipping sauce.
dipping sauce:
1/2 cup plain yogurt
1 tablespoon chopped parsley
2 teaspoons lemon juice
1/2 teaspoon cumin
1/8 teaspoon salt
Whisk together sauce ingredients. Make in advance for optimal flavor.
{cooks note}
This is a great low-fat recipe that is sure to please everyone in your family. We prefer it without the dipping sauce. I like to serve mine with garlic red mashed potatoes and homemade country gravy. I guess it not really that low-fat if you make it with the gravy. :) You could have your crumb mixture and dipping sauce prepared ahead of time to make for a quick and delicious meal for your family on those busy nights.

Egg and dry crumb mixture.

I like to bake mine on parchment paper to avoid the chicken from sticking to the pan.
Enjoy!
Wednesday, March 23, 2011
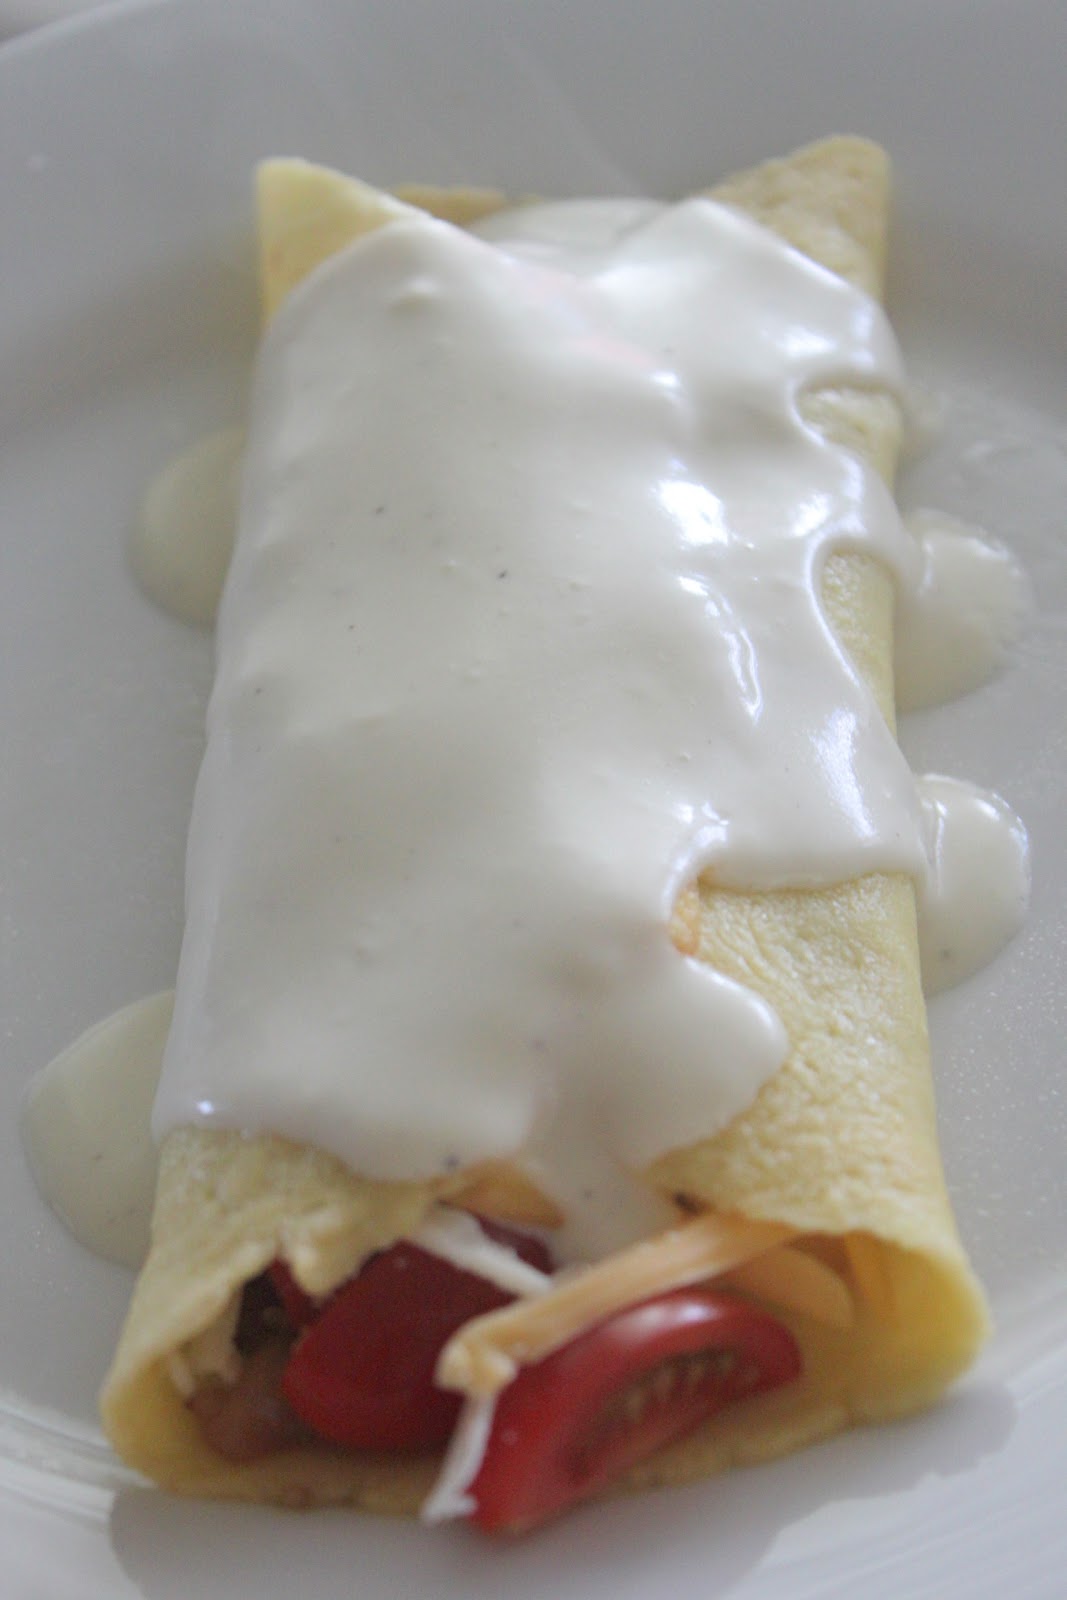
Savory Crepes
Savory Crepes
from Emeril Lagasse (slightly adapted) the sauce only
4 tablespoons butter
1/4 cup flour
2 cups chicken broth
1 1/2 cups heavy cream
1/2 teaspoon salt
1/4 teaspoon pepper
I used this recipe for the crepes.
{cooks note}
Sunday evening, my boys wanted crepes. Anytime there are strawberries in the house, they beg for crepes. For a while, I have wanted to try out a new recipe for a crepe filling. My favorite is fresh strawberries with whipping cream. I have tried different fruit variations, but always find myself going back to the strawberries. I searched for a savory recipe and found a sauce I liked, so I went for it. I gathered all of the miscellaneous ingredients I had in my fridge and it was a success. Here is what I used for the filling. Sweet peppers, prosciutto, bacon, ham, cherry tomatoes, Gruyere cheese, Parmesan cheese and cheddar cheese. Any type of filling similar to this would work, these are just the ingredients I already had in my fridge. I sauteed the peppers first and then added the three meats. Once they were cooked, I assembled the crepes and added the tomatoes, cheeses and the sauce. I also poured a little sauce over the top. The sauce was so good and added the perfect touch to the crepes. We saved the fresh strawberries and leftover crepes for our dessert. I'm loving that strawberries are in season again. I'm not loving that my little family can go through $14 worth in three days!


{The picture quality on these is not that great. I didn't have time to adjust my settings.}
Monday, March 21, 2011
Chocolate Peanut Butter Torte

Chocolate Peanut Butter Torte
from My Baking Addiction
1 cup butter, melted, plus more for pan
1 cup unsweetened cocoa powder
2 cups sugar
4 eggs
1 tablespoon pure vanilla extract
1 cup all-purpose flour
1/2 teaspoon kosher salt
10 individual Reese’s Cups, chopped
1 cup unsweetened cocoa powder
2 cups sugar
4 eggs
1 tablespoon pure vanilla extract
1 cup all-purpose flour
1/2 teaspoon kosher salt
10 individual Reese’s Cups, chopped
For the filling:
1/4 cup peanut butter, heated in microwave at 10 second intervals for easy spreading
1/4 cup peanut butter, heated in microwave at 10 second intervals for easy spreading
For the glaze:
3 tablespoons peanut butter
1/4 cup confectioners’ sugar
½ teaspoon pure vanilla extract
1/2 cup heavy cream, plus more if needed
3 tablespoons peanut butter
1/4 cup confectioners’ sugar
½ teaspoon pure vanilla extract
1/2 cup heavy cream, plus more if needed
1/2 cup semisweet chocolate chips
Directions
1. Preheat the oven to 350 F. Butter 2 (8-inch) round pans and line with parchment paper.
2. In a medium bowl combine the 1 cup melted butter and cocoa and stir until the cocoa is dissolved.
3. Add the sugar, 1/4 cup at a time, and mix well. Add the eggs, 1 at a time, and mix until incorporated. Stir in the vanilla, flour and salt and combine until the flour is no longer visible. Fold in the chopped peanut butter cups and divide the mixture between the pans. 4. Bake for approximately 25 minutes, then remove from the oven and set aside to cool.
Run a knife around the edge of each pan and turn out onto a work surface.
5. Put 1 cake layer on a cake plate or a round platter. Spread the 1/4 cup of peanut butter over the first layer and top with the second layer. In a bowl, combine the remaining 3 tablespoons of peanut butter, the confectioners’ sugar, vanilla and heavy cream until a glaze forms. Add more half and half, if needed, to achieve desired thick glaze consistency. Pour the glaze on top of the torte, spreading it out with a small knife allowing it to drip over the sides. Melt the chocolate chips in a double boiler and drizzle over the glaze. Cut into slices and serve.
{cooks note}
About a month ago, I was asked to donate a dessert for a political party auction. The desserts were starting at $50, so I knew I had to make something worth it. After searching my archives, I decided on this Chocolate Peanut Butter Torte that is to die for. I like it because it doesn't have a cakey texture. It's definitely more on the rich brownie side. I used homemade peanut butter (the color of your glaze may vary from mine since I used homemade) and lot's of chocolate peanut butter cups. I cooked one torte in 9 inch round cake pans (it was my test one that I made one week before) and the final one in 8 inch round pans. They both turned out great. I used an 8" round plastic cake container that I purchased from a local grocery store to deliver the cake in. The torte fit perfectly in it and it was easy for people to view since there was a clear plastic dome covering the top. My family and friends absolutely loved the dessert (from when I made a tester) and I will definitely be making this again. I topped the final torte with chopped pieces of chocolate peanut butter cups because you can never have enough chocolate and peanut butter in one dessert.
*The auction was this past Saturday and I'm not sure what my dessert auctioned off for...I'm not sure I want to know. At least I know it went for $50.

Add lot's of chocolate peanut butter chunks. They definitely add to the richness of the dessert.

The first layer of the cake topped with homemade peanut butter.

Top the first layer with the second round cake (more like a giant rich brownie).

Spread the glaze over the entire cake and push over sides.

Heat semi-sweet chocolate in a double boiler and drizzle over the top. I like to put the melted chocolate in a plastic sandwich bag and cut a small tip off the corner and use it to drizzle the chocolate.

After I cut the first piece out. So moist and good.

Really, you can't go wrong with serving this dessert. It's completely easy and quick to make...despite it's complicated looks. :)

The torte I auctioned off with the chocolate peanut butter chunks on top.

This is how I packaged the dessert. I spent .30 on the cake dome and already had the ribbon.

We were supposed to include a small card describing what our dessert was. Hopefully it sounded appetizing to someone.

If you make this, the only thing you'll regret is the slightly larger gut it may or may not give you.
Thursday, February 17, 2011
Almond Granola

Almond Granola
from Keeping Up
1/4 cup brown sugar
1/3 cup honey
1/3 cup oil
1/4 teaspoon salt
1 teaspoon vanilla
1 teaspoon almond extract
4 cups old-fashioned oats
1 cup sliced or slivered almonds
In a large mixing bowl, whisk together brown sugar, honey, oil, salt, vanilla and almond extract until well combined. Fold in oats and almonds. Spread mixture on a rimmed baking sheet and bake at 300 degrees for 10 minutes. Still well, then bake another 10 more minutes, or until lightly browned. Remove from oven and stir again. Cool completely and store in a covered container.
{cooks note}
I was a bit skeptical of this recipe, only because I am not a huge fan of almond extract. Plus I really like this recipe. I gave it a shot and I am so glad I did. It's really tasty and will make a great addition to our breakfast line-up. I added 1/2 a teaspoon of almond extract instead of the 1 teaspoon it calls for. It has a hint of almond flavor...just what I was going for.
Thursday, February 3, 2011
Broiled Tilapia Parmesan

Broiled Tilapia Parmesan
from allrecipes.com
1/2 cup Parmesan cheese
1/4 cup butter, softened
3 tablespoons mayonnaise
2 tablespoons fresh lemon juice
1/4 teaspoon dried basil
1/4 teaspoon ground black pepper
1/8 teaspoon onion powder
1/8 teaspoon celery salt
2 pounds tilapia fillets
Preheat your oven's broiler. Grease a broiling pan or line pan with aluminum foil.
In a small bowl, mix together the Parmesan cheese, butter, mayonnaise and lemon juice. Season with dried basil, pepper, onion powder and celery salt. Mix well and set aside.
Arrange fillets in a single layer on the prepared pan. Broil a few inches from the heat for 2 to 3 minutes. Flip the fillets over and broil for a couple more minutes. Remove the fillets from the oven and cover them with the Parmesan cheese mixture on the top side. Broil for 2 more minutes or until the topping is browned and fish flakes easily with a fork. Be careful not to over cook the fish.
{cooks note}
As my sister would say "Best white fish recipe I have made at home." My other sister emailed this to me a few months ago and I had yet to try it. I picked up some Tilapia at Costco and decided to try it. Wow. So, so good. I used 2.5 pounds because 1) my husband eats a lot! and 2) we like leftovers. Since I cooked a little more fish than the recipe called for I added a little bit extra of everything. This fish is so light and flakey, you'll definitely want more. The good news is the leftovers, if there are any, are just as good as the first day if not better. If you hesitate buying fish because of the cost, try and make extra room in your monthly budget for it. It's so healthy for you.

I got 8 fillets in my bag.

Each fillet is individually wrapped.

I like to use fresh grated Parmesan cheese whenever I can. It's somewhat unusual for a fish recipe to include any type of cheese.

Another ingredient that threw me off.

The mixture, once everything is added. Doesn't look that tasty yet.

I used heavy duty tinfoil and lined my pan with it. You really can't beat one less pan to wash.

Just out of the oven...

and just before entering my mouth. Please try this soon and let me know what you think.
Friday, January 28, 2011
Armommy
A few months ago, Rae of Armommy, asked me if I wanted her to send me some of her products to review. Of course I was delighted, I have been a fan for a while now...remember this post? I received the package in the mail a few months ago and moved soon after, so it's been on the back burner for a while. Now that the sun has decided to make it's appearance for a few days, I thought I had better take advantage and pull the package of goodies out and snap away. I asked my niece, Kate, to be my little model. She kindly obliged since it involved being a model and looking cute.
First, here is a picture of Rae and her cute family. Isn't Rae beautiful?

First, here is a picture of Rae and her cute family. Isn't Rae beautiful?

Rae made customized place mats for each of my children. Since the boys are at the perfect age for wanting to help me set the table, Rae thought it would be fun to send me the place mats that show children where each thing goes. Brilliant! Kate didn't need any help and thought it was so fun to set the place setting herself. You can go to Armommy's shop to see what other goodies they have. If you like the style of place mat that Rae made for my children, you can see them in her shop.

Meet Kate. At first she was shy.

That didn't last too long.

The place mat. I think these are so cute. I love the owl. They are made of professional grade laminate and are 12x18. Armommy also does custom orders. Just send them an email and they will be happy to work with you.

Look how good she is doing...no help from me.

Look how hard she is concentrating...the tongue comes out when she is concentrating hard.

Yes, her hair is all natural. Add a little water, and voila! Back to the place mats.

The last item placed...the cup.

The finished product. These would make the best gifts for those little one's in your life.

Blake's custom place mat...

and Carter's.
Lastly, she sent me their signature snack bags. Look how stylish they are. Plus, they save the environment.

Just fill them up and velcro them closed.

Thank you, Rae! I love it all.
Go here to view Armommy's blog. Lot's of creative ideas.
p.s. Another of my favorites is their smib.
Monday, January 24, 2011
How to Peel and Segment a Grapefruit
Have you ever seen a recipe that called for segments of a grapefruit or an orange, but you skipped that ingredient/step because it sounded too difficult to do? Well, today's little tutorial should help you the next time you run into that problem. Segmenting an orange or grapefruit is quite easy, actually. We eat a good amount of grapefruit in the winter at our house, so I find myself doing this all the time. I finally got around to making a little tutorial for you. Let's begin.

First you need to have a sharp knife. You can use either a chef's knife or a serrated knife. I used a serrated on this particular day. Cut each end of the grapefruit off and set aside. This will allow you to see the "meat" of the fruit underneath it's rind. It also provides a base for the fruit to sit on while you cut the rind off. Take your knife and start at the top cutting the skin off as you go. Be careful not to cut too much of the fruit off because it will end up in the garbage.

Once you have taken all of the rind off, your grapefruit will look like the picture above. Now it is time to cut the segments out. If you used a chef's knife, I would recommend using a paring knife or a smaller serrated knife to help you cut each segment out. Cut down on one side of the segment and flip your knife over. The segment should push right out. Sound confusing? I will link up to a great little video that will show you all about it at the end.

At this point, I have cut a few segments out.

Here is a picture of a segment almost ready to fall into the bowl. I couldn't hold my knife in position to show you where it was exactly, because I only have two hands.

Here is another view of the grapefruit.

The empty grapefruit. Do not just throw that in the trash. Squeeze all of the juice out of it before you throw it away.

Once you try it out a few times, it becomes a piece of cake and you can do it much faster. Click on this for a short video tutorial.
Friday, January 21, 2011
Faux "Bran" Muffins

Faux "Bran" Muffins
from Keeping Up
1/2 cup butter, softened
1 1/4 cups brown sugar
2 eggs
1 tablespoon vanilla
1 tablespoon molasses
2 teaspoons baking powder
1 teaspoon baking soda
1 1/2 teaspoons salt
2 cups milk
2 cups whole wheat flour
2 cups old-fashioned oats
Cream together butter and brown sugar. Add eggs, vanilla, molasses, baking powder, baking soda and salt. Mix in milk, then add flour and oats. Mix until combined. Pour batter into 18 greased muffin cups and bake at 375 for 15 to 20 minutes or until muffin centers spring back when touched. Serve warm with butter and honey.
{cooks note}
Wow. These muffins are 100% whole grain and completely delicious. My sister brought us over some a month or so ago and I was smitten. My husband didn't get the chance to try one because the kids and I devoured all of them. They were that good. I didn't have any ground wheat already prepared so I ground some in my Blendtec. I ground 4 cups, just because, and it was finished in 50 seconds. I really do love this machine. I know I've convinced a few of you to purchase one, so here is another great way to use it. If you don't have a wheat grinder already, this one works great for jobs like this. Side note: I will still use my Nutrimill for grinding wheat most of the time because I like to adjust how fine it is, but the Blendtec works for those times when I don't want to pull the whole thing out just to grind 2 cups of wheat.

Grinding the wheat.

Fresh ground whole wheat really is the best.

Cream the brown sugar and softened butter together.

Add the eggs, baking powder, baking soda, vanilla, molasses and salt. Mix until just combined.

Add the milk.

Add the ground whole wheat flour and oats together.


Mix until the dry ingredients are just barely wet. Over mixing will result in a dense muffin with a tall peak and we are looking for light and moist and rounded on the top.

I sprinkled some oats on the top because I think they look prettier that way. We eat with our eyes, right?

My husband claimed these were "The best muffins he has ever eaten." I wouldn't go that far, but they are a pleaser in my house.
Subscribe to:
Posts (Atom)