Thursday, September 26, 2013

Quinoa, Black Bean and Corn Tacos


I have been wanting to try these tacos out for a really long time now and have put them on the menu for a couple of weeks, but by the time I went to make them, I was out of a few of the ingredients.  I finally made them on Monday, and they were a huge hit.  Every one of my children loved them and even had seconds!  This meal is incredibly healthy and so satisfying.  The quinoa needs to be thoroughly rinsed before cooking; otherwise, it might have a really bitter taste to it.  I cooked mine in chicken broth to help add some flavor.  I cooked 2 cups quinoa in 4 cups of chicken broth.  Bring to a boil, cover and simmer for 20 minutes.  Make it a few hours or days ahead of time, so it is cooled by the time you need to use it.  I wasn't sure how many tacos this would make, so I made 1 1/2 times the recipe.  It made more than enough.  I bought fresh corn tortillas at the tortilla factory that we used the same day, and the next day for lunch we had it with flour tortillas.  I like it with both, but is much easier for kids to eat if you use flour.   If you use corn, I recommend heating them up on a skillet to somewhat harden the shell (not crunchy).  That way, they don't become soft and the tacos filling doesn't fall through the tortilla.  I also added diced radishes because I love the flavor they add.  Enjoy!


Quinoa, Black Bean and Corn Tacos
Ingredients
  • 1 1/2 cups cooked quinoa
  • 1 Tbsp olive oil
  • 1 medium yellow onion, diced
  • 3 cloves garlic, finely minced
  • 1 cup vegetable broth or chicken broth
  • 1 (14.5) oz can diced tomatoes with green chilis, undrained
  • 1 1/2 tsp chili powder
  • 1 tsp ground cumin
  • 1/2 tsp paprika
  • 1/4 - 1/2 tsp cayenne pepper
  • 1/4 tsp ground coriander
  • Salt and freshly ground black pepper, to taste
  • 1 1/2 cups frozen corn
  • 2 (15 oz) cans black beans, drained and rinsed
  • juice of 1 lime
  • 1/2 cup cilantro, chopped
  • Serve with:
  • corn or wheat tortillas
  • chopped lettuce
  • Monterey Jack, cheddar or a combination
  • diced avocados
  • diced tomatoes
  • hot sauce
  • diced radishes
Directions
  • Heat olive oil in a large non-stick saucepan over medium high heat. Once hot, add onion and saute until golden and tender, about 3 minutes. Add in garlic and saute 30 seconds longer. Stir in broth, diced tomatoes, cooked quinoa, chili powder, cumin, paprika, cayenne, coriander and season with salt and pepper to taste. Bring mixture to a boil, then reduce heat, cover saucepan with lid and simmer about 20 minutes, until mixture has thickened.
  • Stir in corn and black beans and simmer, uncovered 5 - 10 minutes, stirring occasionally. Mix in lime juice and cilantro. Serve warm over tortillas with desired toppings.
Source:  Cooking Classy (adapted slightly)

**I know you can barely see any of the filling in the tacos.  I got carried away with the lettuce and other toppings and didn't care by that point because my baby was crying in the background begging to be fed.  

Tuesday, September 17, 2013

Coconut Vanilla Granola


I am always looking for recipes to use or incorporate coconut oil in, so when I came across this one I made it right away.  The great thing about granola is you can add and take away what you don't like.  I added sunflower seeds and used the roasted chopped almonds from Winco instead of the sliced.   I am not a dried fruit in my granola kind of girl, but if that suits your fancy, go for it.  This granola is by far my favorite one out there.  Your house will smell amazing and that touch of nutmeg makes it feel instantly like Fall.  

Coconut Vanilla Granola
adapted slightly from Table for Two

4 cups old fashioned oats
1 1/2 cups walnuts, chopped
1 1/2 cups shredded sweetened coconut
1 cup sliced almonds
1/4 cup brown sugar
2 tsp. cinnamon
1/2 tsp. nutmeg
1/2 tsp. salt
1/2 cup coconut oil, melted
1 cup pure maple syrup
1 T. vanilla extract
2 tsp. vanilla bean paste

Preheat oven to 325 degrees and line two large baking sheets with parchment paper.  Set aside. 

In a large bowl, combine the oats, walnuts, shredded coconut, almonds, brown sugar, cinnamon, nutmeg and salt.  In a medium bowl, whisk together the coconut oil, maple syrup, vanilla extract and vanilla bean paste.  Pour the liquid mixture over the oat mixture and stir until well combined.  Spread evenly on the lined baking sheets and bake for 30-45 minutes or until lightly golden.  Stir every 10 minutes to make sure you get even baking and to avoid burning.  Cool completely and store in air tight containers.

**I baked mine for 35 minutes.

{cooks note}
I purchase my coconut oil from Costco because it is much cheaper than buying it anywhere else.  I also bought 100% pure maple syrup from Costco.  If you do not have vanilla bean paste, you do not want to skip it.  Purchase some here.  You will not be disappointed.  I go through this stuff way too fast.  I usually only use it in recipes where you will actually see the speckles of bean.  

I am obviously no good at taking pictures, but I included this one because it gives you a closer look at what the granola looks like.  


Wednesday, September 11, 2013

Chocolate Chip Pudding Cookies

Hello?  Anybody out there?  I'm pretty sure I forgot how to blog.  Everything needs updated.  I'm actually scared to even look at my archives and see the pictures I took.  Yikes!  I'm not bringing this thing back from the dead yet.  Maybe a recipe here and there.  We'll see.

 I thought this would be the easiest way to post the recipe for the picture I put on Instagram today.  These cookies have become a favorite of mine recently.  I have been sifting through and organizing all of my recipes and I found this one I had typed out years ago.  Not sure the source, but it's a good one.  I noticed that in a previous post I said chocolate chip cookies with pudding were "fine".  I take that back.  THESE chocolate chip cookies with pudding are great! It all depends on the recipe.  I add m&m's to most of my chocolate chip cookies because everything is better with an m&m.  Am I right?


Chocolate Chip Pudding Cookies

1 cup shortening and 1c butter
1 1/3 cup sugar
1 1/3 cup brown sugar
Add 1 tsp vanilla
4 eggs
2 tsp salt
2 tsp soda
5 1/4 c flour
package instant vanilla pudding
1 cup chocolate chips
1 cup mini m&m's
Sea salt
Cream shortening/butter and sugars together.  Add eggs one at a time. Add vanilla.  Mix in the salt, soda and flour until just combined.  Add the pudding until combined.  Fold in the chocolate chips and mini m&m's.  Lightly sprinkle with sea salt just before baking.  Bake at 350 for 10-12 minutes.  Best if they are lightly golden on the bottom and slightly underdone on the top.   

Thursday, May 26, 2011

Leave of absence

I had plans to start posting recipes again, but this week things have changed for our family.  Go here to read more about it.

Wednesday, March 30, 2011

Crispy Oven-fried Chicken

Crispy Oven-fried Chicken
from Keeping Up

1 cup Rice Krispies cereal
1/4 cup grated fresh parmesan cheese
2 teaspoons paprika
1/2 teaspoon cumin
1/2 teaspoon salt
1/8 teaspoon pepper
3 cloves garlic, minced
1 large egg, beaten
4 boneless, skinless chicken breasts

Place all ingredients (except egg and chicken) in a food processor and pulse until uniformly mixed.  Pour mixture into a shallow dish.  Dip each piece of chicken in egg, then in seasoning mixture, pressing to coat.  Bake on a greased baking sheet in a 350 degree oven until no longer pink in the center, about 30 minutes.  Let stand 5 minutes before serving.  Serve with yogurt dipping sauce.

dipping sauce:
1/2 cup plain yogurt
1 tablespoon chopped parsley
2 teaspoons lemon juice
1/2 teaspoon cumin
1/8 teaspoon salt

Whisk together sauce ingredients.  Make in advance for optimal flavor.

{cooks note}

This is a great low-fat recipe that is sure to please everyone in your family.  We prefer it without the dipping sauce.  I like to serve mine with garlic red mashed potatoes and homemade country gravy.  I guess it not really that low-fat if you make it with the gravy.  :)  You could have your crumb mixture and dipping sauce prepared ahead of time to make for a quick and delicious meal for your family on those busy nights.  


Egg and dry crumb mixture.


I like to bake mine on parchment paper to avoid the chicken from sticking to the pan.


Enjoy!    

Wednesday, March 23, 2011

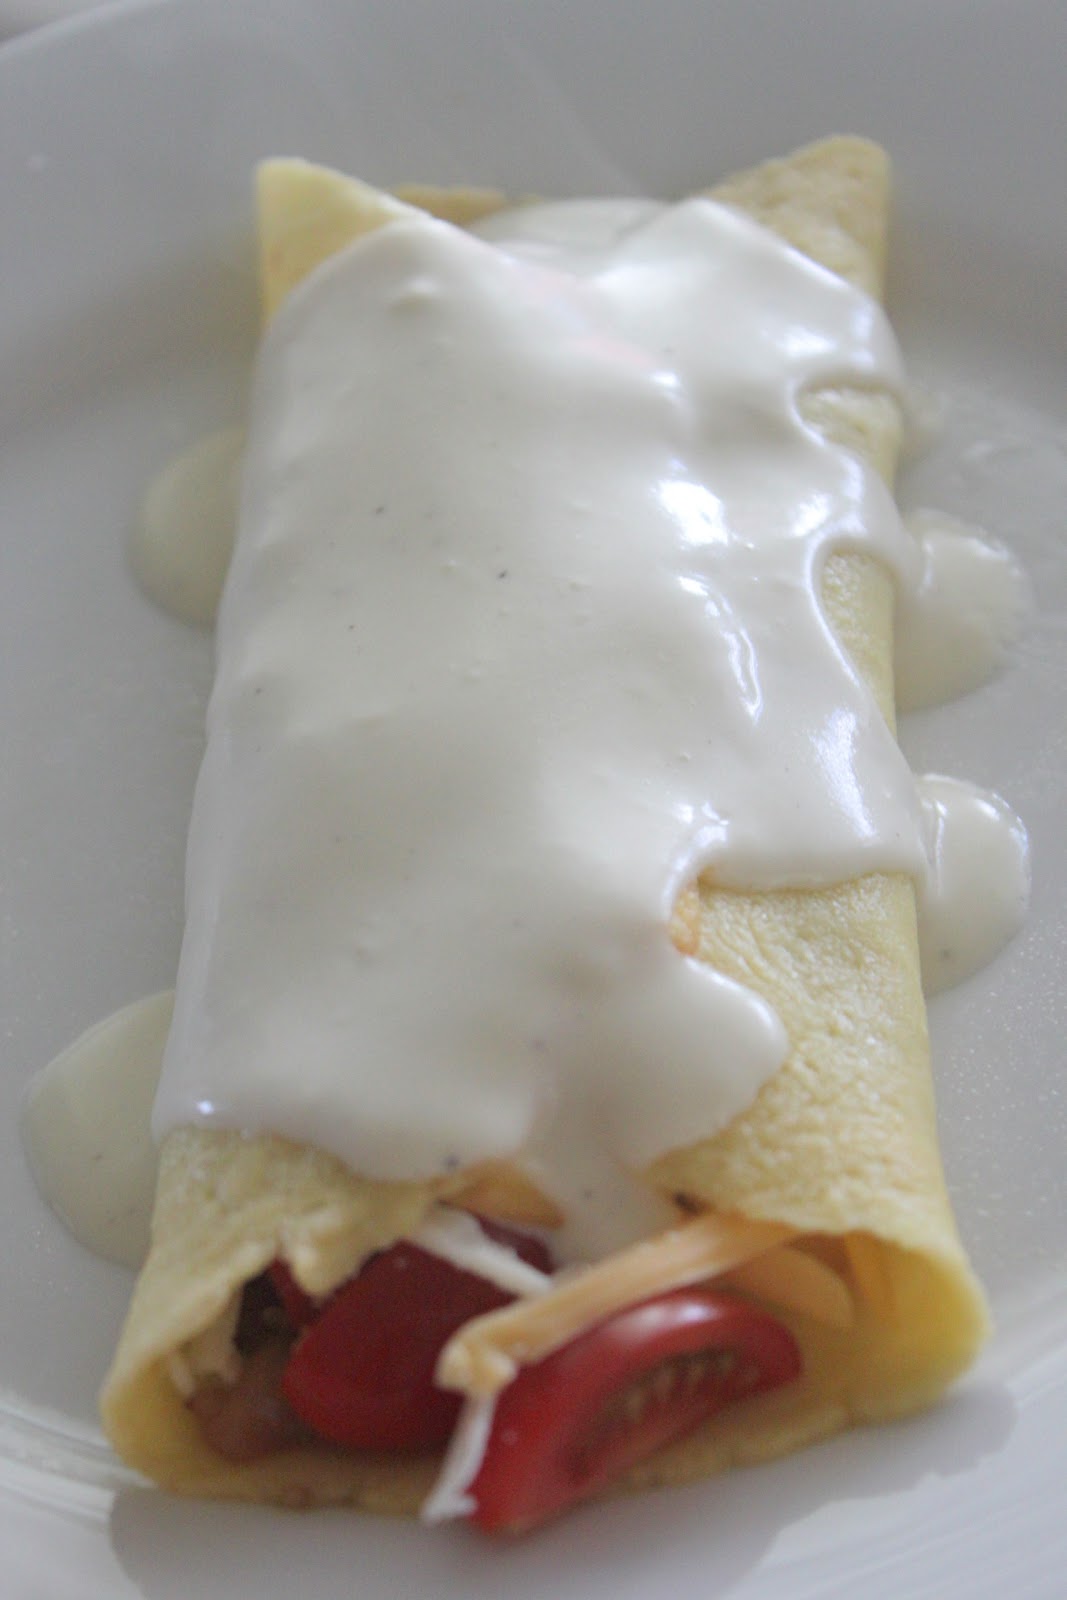
Savory Crepes


Savory Crepes
from Emeril Lagasse (slightly adapted) the sauce only

4 tablespoons butter
1/4 cup flour
2 cups chicken broth
1 1/2 cups heavy cream
1/2 teaspoon salt
1/4 teaspoon pepper

In a medium saucepan, melt 4 tablespoons of the butter over medium heat. Add the flour and cook, stirring constantly, until thickened into a pale blond roux, 2 to 3 minutes. Add the hot stock in a steady stream, whisking to incorporate. Bring to a simmer and cook, stirring frequently with a heavy wooden spoon until thick. Add 1/4 teaspoon of the salt and 1/8 teaspoon of the pepper, and stir to incorporate. Slowly whisk in the cream and simmer, stirring, until well incorporated and thickened. Remove from the heat.

I used this recipe for the crepes.

{cooks note}

Sunday evening, my boys wanted crepes.  Anytime there are strawberries in the house, they beg for crepes.  For a while, I have wanted to try out a new recipe for a crepe filling.  My favorite is fresh strawberries with whipping cream.  I have tried different fruit variations, but always find myself going back to the strawberries.  I searched for a savory recipe and found a sauce I liked, so I went for it.  I gathered all of the miscellaneous ingredients I had in my fridge and it was a success.  Here is what I used for the filling.  Sweet peppers, prosciutto, bacon, ham, cherry tomatoes, Gruyere cheese, Parmesan cheese and cheddar cheese.  Any type of filling similar to this would work, these are just the ingredients I already had in my fridge.  I sauteed the peppers first and then added the three meats.  Once they were cooked, I assembled the crepes and added the tomatoes, cheeses and the sauce.  I also poured a little sauce over the top.  The sauce was so good and added the perfect touch to the crepes.   We saved the fresh strawberries and leftover crepes for our dessert.  I'm loving that strawberries are in season again.  I'm not loving that my little family can go through $14 worth in three days!

{The picture quality on these is not that great.  I didn't have time to adjust my settings.}

Monday, March 21, 2011

Chocolate Peanut Butter Torte


Chocolate Peanut Butter Torte
from My Baking Addiction

1 cup butter, melted, plus more for pan
1 cup unsweetened cocoa powder
2 cups sugar
4 eggs
1 tablespoon pure vanilla extract
1 cup all-purpose flour
1/2 teaspoon kosher salt
10 individual Reese’s Cups, chopped
For the filling:
1/4 cup peanut butter, heated in microwave at 10 second intervals for easy spreading
For the glaze:
3 tablespoons peanut butter
1/4 cup confectioners’ sugar
½ teaspoon pure vanilla extract
1/2 cup heavy cream, plus more if needed
1/2 cup semisweet chocolate chips
Directions
1. Preheat the oven to 350 F. Butter 2 (8-inch) round pans and line with parchment paper.
2. In a medium bowl combine the 1 cup melted butter and cocoa and stir until the cocoa is dissolved.
3. Add the sugar, 1/4 cup at a time, and mix well. Add the eggs, 1 at a time, and mix until incorporated. Stir in the vanilla, flour and salt and combine until the flour is no longer visible. Fold in the chopped peanut butter cups and divide the mixture between the pans. 4. Bake for approximately 25 minutes, then remove from the oven and set aside to cool.
Run a knife around the edge of each pan and turn out onto a work surface.
5. Put 1 cake layer on a cake plate or a round platter. Spread the 1/4 cup of peanut butter over the first layer and top with the second layer. In a bowl, combine the remaining 3 tablespoons of peanut butter, the confectioners’ sugar, vanilla and heavy cream until a glaze forms. Add more half and half, if needed, to achieve desired thick glaze consistency. Pour the glaze on top of the torte, spreading it out with a small knife allowing it to drip over the sides. Melt the chocolate chips in a double boiler and drizzle over the glaze. Cut into slices and serve.
{cooks note}
About a month ago, I was asked to donate a dessert for a political party auction.  The desserts were starting at $50, so I knew I had to make something worth it.  After searching my archives, I decided on this Chocolate Peanut Butter Torte that is to die for. I like it because it doesn't have a cakey texture.  It's definitely more on the rich brownie side.  I used homemade peanut butter (the color of your glaze may vary from mine since I used homemade) and lot's of chocolate peanut butter cups.  I cooked one torte in 9 inch round cake pans (it was my test one that I made one week before) and the final one in 8 inch round pans.  They both turned out great.  I used an 8" round plastic cake container that I purchased from a local grocery store to deliver the cake in.  The torte fit perfectly in it and it was easy for people to view since there was a clear plastic dome covering the top.  My family and friends absolutely loved the dessert (from when I made a tester) and I will definitely be making this again.  I topped the final torte with chopped pieces of chocolate peanut butter cups because you can never have enough chocolate and peanut butter in one dessert.  
*The auction was this past Saturday and I'm not sure what my dessert auctioned off for...I'm not sure I want to know.  At least I know it went for $50.

Add lot's of chocolate peanut butter chunks.  They definitely add to the richness of the dessert.


The first layer of the cake topped with homemade peanut butter.


Top the first layer with the second round cake (more like a giant rich brownie).  


Spread the glaze over the entire cake and push over sides.


Heat semi-sweet chocolate in a double boiler and drizzle over the top.  I like to put the melted chocolate in a plastic sandwich bag and cut a small tip off the corner and use it to drizzle the chocolate. 


After I cut the first piece out.  So moist and good.  


Really, you can't go wrong with serving this dessert.  It's completely easy and quick to make...despite it's complicated looks.  :)


The torte I auctioned off with the chocolate peanut butter chunks on top.  


This is how I packaged the dessert.  I spent .30 on the cake dome and already had the ribbon.  


We were supposed to include a small card describing what our dessert was.  Hopefully it sounded appetizing to someone.


If you make this, the only thing you'll regret is the slightly larger gut it may or may not give you.